Overview
Offshore salmon farming in New Zealand faces significant losses from pinniped predation. Lethal control is prohibited under the Marine Mammals Protection Act, and commercial acoustic deterrent devices (ADDs) cost USD 3,400–4,800 per unit, making widespread adoption difficult for smaller operations. The project aimed to design, fabricate and test low-cost underwater acoustic transducers suitable for in-house production, targeting the 9–11 kHz range at 150 dB re 1 µPa at 1m, with a total fabrication cost under 500 NZD. This frequency band sits at the peak auditory sensitivity of pinnipeds while remaining largely undetectable to fish species.
Design
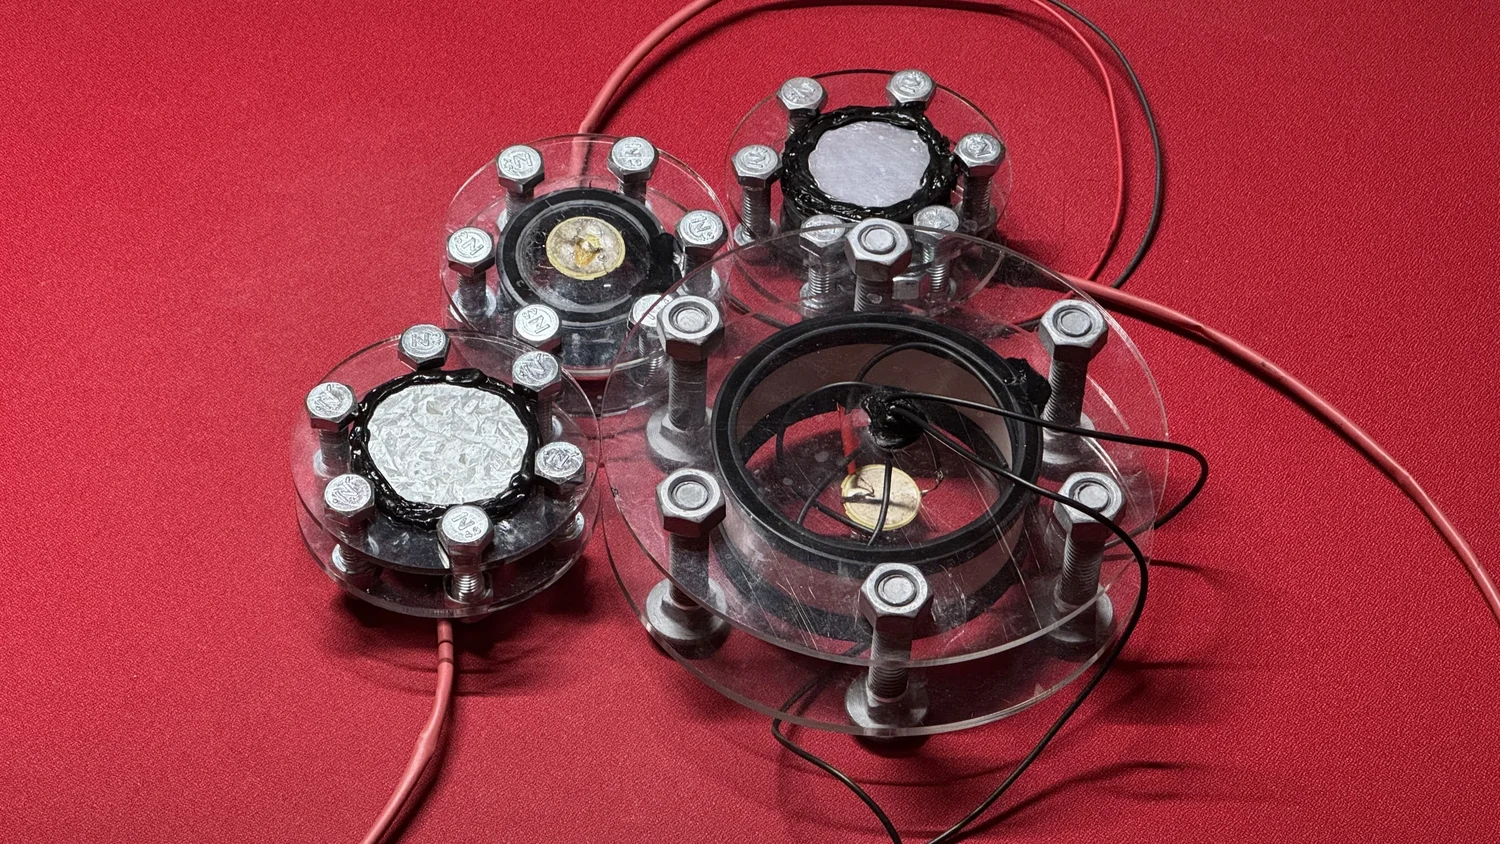
The transducer couples a 27mm piezoelectric disk element to a rigid diaphragm inside a 50mm diameter PVC cylindrical housing. Piezoelectric ceramics were used over conventional speakers for their superior acoustic impedance matching with water, where air speakers suffer significant energy loss when submerged. The housing is sealed at both ends with 3mm laser-cut acrylic panels compressed by six M8x30mm stainless steel bolts against a rubber C-channel gasket, with silicone applied at cable pass-throughs and panel interfaces. The diaphragm is oriented externally so water pressure acts to enhance the seal. Electrical connections are routed through a rear cable gland, allowing rear panel removal for maintenance without disturbing the wiring. The modular design allows component replacement without destructive disassembly.
Five diaphragm configurations were fabricated to compare material effects: 0.45mm steel, 3mm standard acrylic, an enlarged acrylic variant, 0.7mm aluminium, and brass. Each used the same housing geometry to isolate the effect of diaphragm material and size. Metal diaphragms were mounted using silicone with the piezoelectric element bonded to the inner surface using cyanoacrylate. The brass prototype was excluded after the piezoelectric element broke during assembly.
Testing
Prototypes were tested in a 1.06 m³ water tank with a calibrated hydrophone at 1m separation. An Aquarium Acoustic S1e hydrophone at -180 dBV/µPa sensitivity connected to a Roland Octa-Capture audio interface at 196 kHz sampling captured output via Room EQ Wizard. A BK Precision LCR meter measured complex impedance and phase angle at each test frequency, from which real electrical power consumption was calculated. Each prototype underwent a frequency sweep from 5 to 20 kHz to characterise broadband response, followed by sustained measurements at 9, 10 and 11 kHz.
Results
The steel diaphragm achieved 120.2 dB at 10 kHz, with a peak of 125.5 dB at 5.61 kHz. The enlarged acrylic panel reached 135.2 dB at 18.86 kHz and 119.9 dB at 9 kHz. Acrylic diaphragms performed better at higher frequencies due to their lower density and higher stiffness-to-weight ratio, while steel performed better at lower frequencies due to its greater mass. The enlarged acrylic outperformed the standard acrylic by approximately 15 dB at 9 kHz, consistent with the increased radiating area improving acoustic impedance matching with water. The aluminium prototype failed during testing from water ingress through a compromised seal, recording a post-failure peak of 64.8 dB.
Power consumption across functional prototypes ranged from 0.126 to 0.47 mW, closely matching the theoretical requirement of 0.17 mW. None of the prototypes reached the 150 dB target, though the steel and enlarged acrylic results demonstrate potential for further performance gains through increased drive power. Each unit cost approximately NZD 18.20 to fabricate, a forty to fiftyfold reduction compared to commercial alternatives.